
January-March Blog Post
by Tatyana Faleolo-Nolan
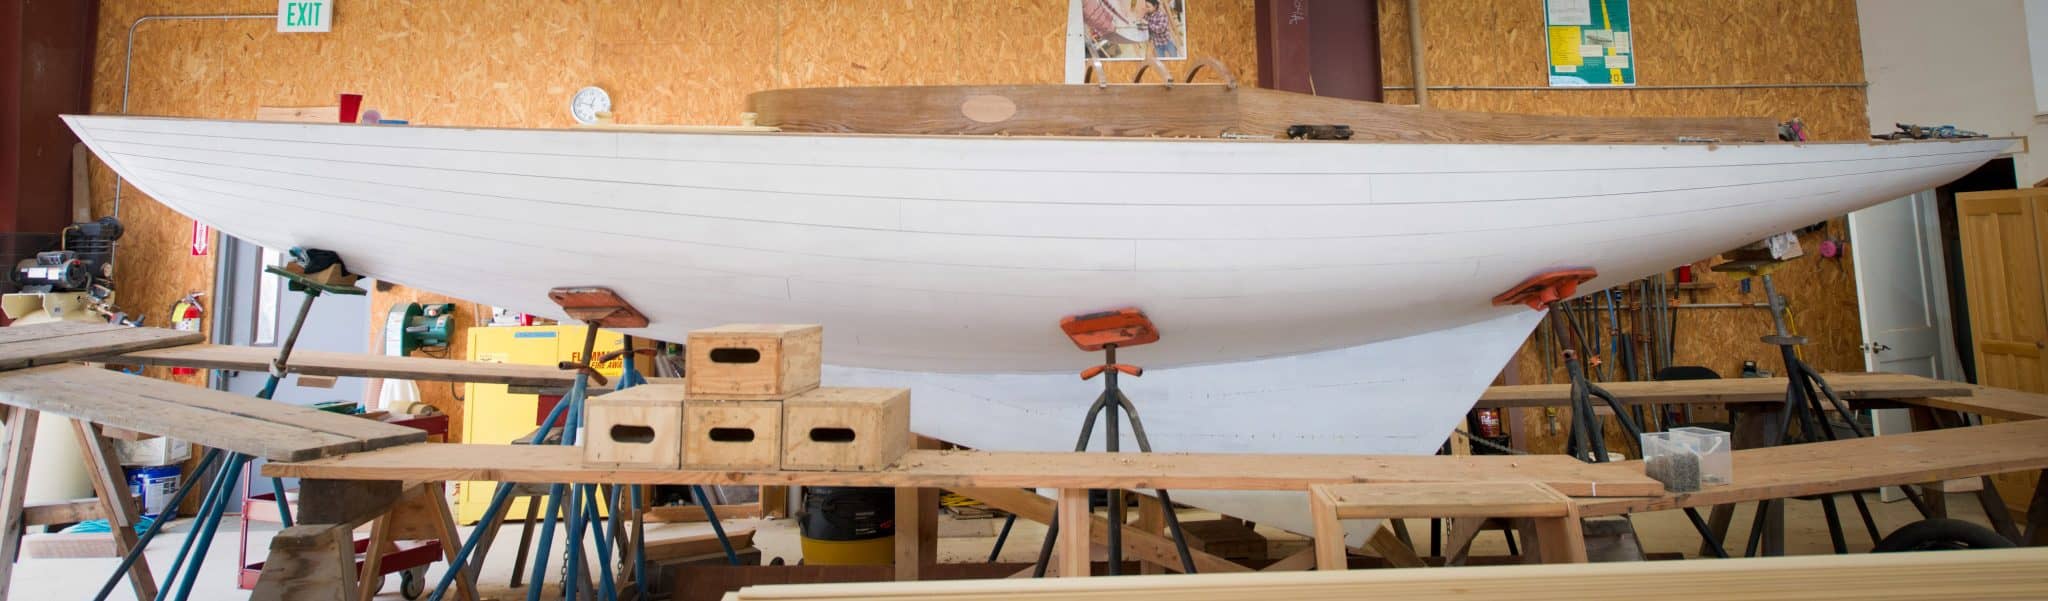
From the beginning of January to the middle of March, we made a lot of progress on the Felicity Ann. To start off the project we had to take apart a few things. It was small and easy things at first but gradually it got more intense as the quarter went by.
One of the first things we had to do was remove all the bungs from two lower planks, the bullworks, and the deck. We used a scratch awl and a mallet to remove the bungs so we could access the screws. The two lower planks were riveted and not fastened with screws. Although, the deck and bullworks were held and were fastened with screws. Once we revealed all the screw heads, the next step was to take them out. We had to clear away the entire gunk from the head of the screw first, so the bit could fit in it without stripping it. We used our screw drivers or a brace to remove the screws without breaking them in half or stripping the heads. It might have been a tad difficult but we managed to remove all the screws from the deck and the bullworks. After that we pulled off the bullworks from Felecity Ann.
The next big part that we had to take off was the cabin. We had to take measurements of the cabin first so we would know the dimensions for when we make the new one. We started with removing the deck to reveal the deck beams. We took out more screws that we missed and used a sawzall to cut through the deck. After the deck was taken out from the bow we started in on removing the cabin. Jo went along starboard side with a sawzall, and I went along port side with a sawzall and we cut through the length of the cabin. The whole class was brought together once we were finished and together we lifted the cabin off Felecity. She was very bare after the cabin was gone and there was more room to move around.
We were finally able to start building and stopped destroying things for a while. Three brand new planks were made, two on starboard side and one on port side. The existing planks were all kinds of wonky so it made it difficult to make new ones. We had to make a spiling pattern for each one so we knew how the next one would be shaped. Jo and I made a spiling block just for our planks. On our first plank we spiled to the inside, on our second we spilied to the outside. When our spiling patterns were made, we took it off the boat and placed it on a piece of larch. All the planks on Felicity Ann are made of larch.
From there we transferred our information from the spiling to the larch. We put down the heights, spiling marks, bevels, and frame numbers. We placed a baton on each side and tried to fair our lines as best we could. After the lines were drawn we cut out our plank on the band saw. It takes about three people to cut out the plank on the huge band saw. One to lead the cut, one person to tail, and another person to swing the bevels. I usually try to cut as close as I can to the line so we have very little to clean up. When our plank is cut out, we take our planes and shave off the extra and add a caulking bevel. The final step to preparing a plank is using a backing out plane to shave off a certain amount on the inside of the plank for the frames to fit nicely. Once this is done we put the plank in the steam box.
After it comes out of the steam box, we have to clamp the plank in its rightful spot from bow to stern. Trying to get it as tight as we can and to close up all the gaps. From her we start to rivet the plank to the frames. At the rabbet we drill two pilot holes and put in two screws with a brace to hold it in place. On every frame we have to put two rivets in the plank and frame, there are 42 frames. We have one drill that has a forsner bit and a second drill that has a normal bit. The forsner is used first then the second one is used for a pilot hole. There’s one person on the outside that hammers in the nail, and the person on the inside attaches the rove. This process is repeated until we get to the stern and add two more screws to that rabbet.
Not long after adding all three planks, we went back to taking things apart. We started with taking off the knees, although we weren’t able to get off all the knees. On each side we had to mark where the frames were located on the clamp. I took an angle grinder and grinded off all the rivets and bolts that held the clamp to the frames. As I grinded, Jo went behind me and tapped out all the grinded nails. Jo took a sawzall and cut the Sampson post and whatever else connected the deck to the boat. The class got together again and we lifted the remaining deck off Felicity Ann and placed it on the ground.
Ever since then we’ve been building new parts for Felicity. The first thing we started to build was the new clamp. Making the clamp was similar to making a plank. We spiled both starboard and port, took bevels and heights, and laid out our information on a piece of fir. We transferred all our information and cut out the two pieces. We faired and cleaned it up and off to the steam box it goes! The clamp was also riveted to Felicity Ann, except one nail per frame. The shelf was the next thing we constructed, and we also had to spial it. The shelf had scarves so we had to plan it more carefully than a plank of clamp. We ended up with three pieces for each side and two scarves per side. While Jo and I worked on the shelf, John made all the deck beams. There’s six deck beams on the felicity Ann, all of which are sapele.
While I finished making the port shelf, John and Jo made the spur beams. When the shelf was finished we had to place the deck beams and plan where and how they would fit. We cut notches on each end and cleaned it up nicely so they fit perfectly on the shelf. For the last week of school before spring break, we fastened in the shelf and got four of the deck beams drilled and bolted into place. That is how our quarter ended, with exciting more work to do next quarter.
–
The Northwest School of Wooden Boatbuilding is everyone’s wooden boat school!
–
–